I’ve been doing a lot of research on digital art recently and I noticed that Ambient Occlusion is quite popular right now. I’ve had only heard the term wit connection to 3D modelling, but not much with regard to digital paintings.
Yet, the premise seemed very fascinating to me and I wanted to try it out. I’ve always had problems with more difficult lighting and AO seemed like a more organised approach to what’s been giving me a hard time.
So over the past week, I drew a picture of Zenyatta, an original skin I just had to put out there and I used the AO method to color it. While it is by no means perfect, I did understand a lot of things better this time around.
I have put the whole process into one image, which you can see here:
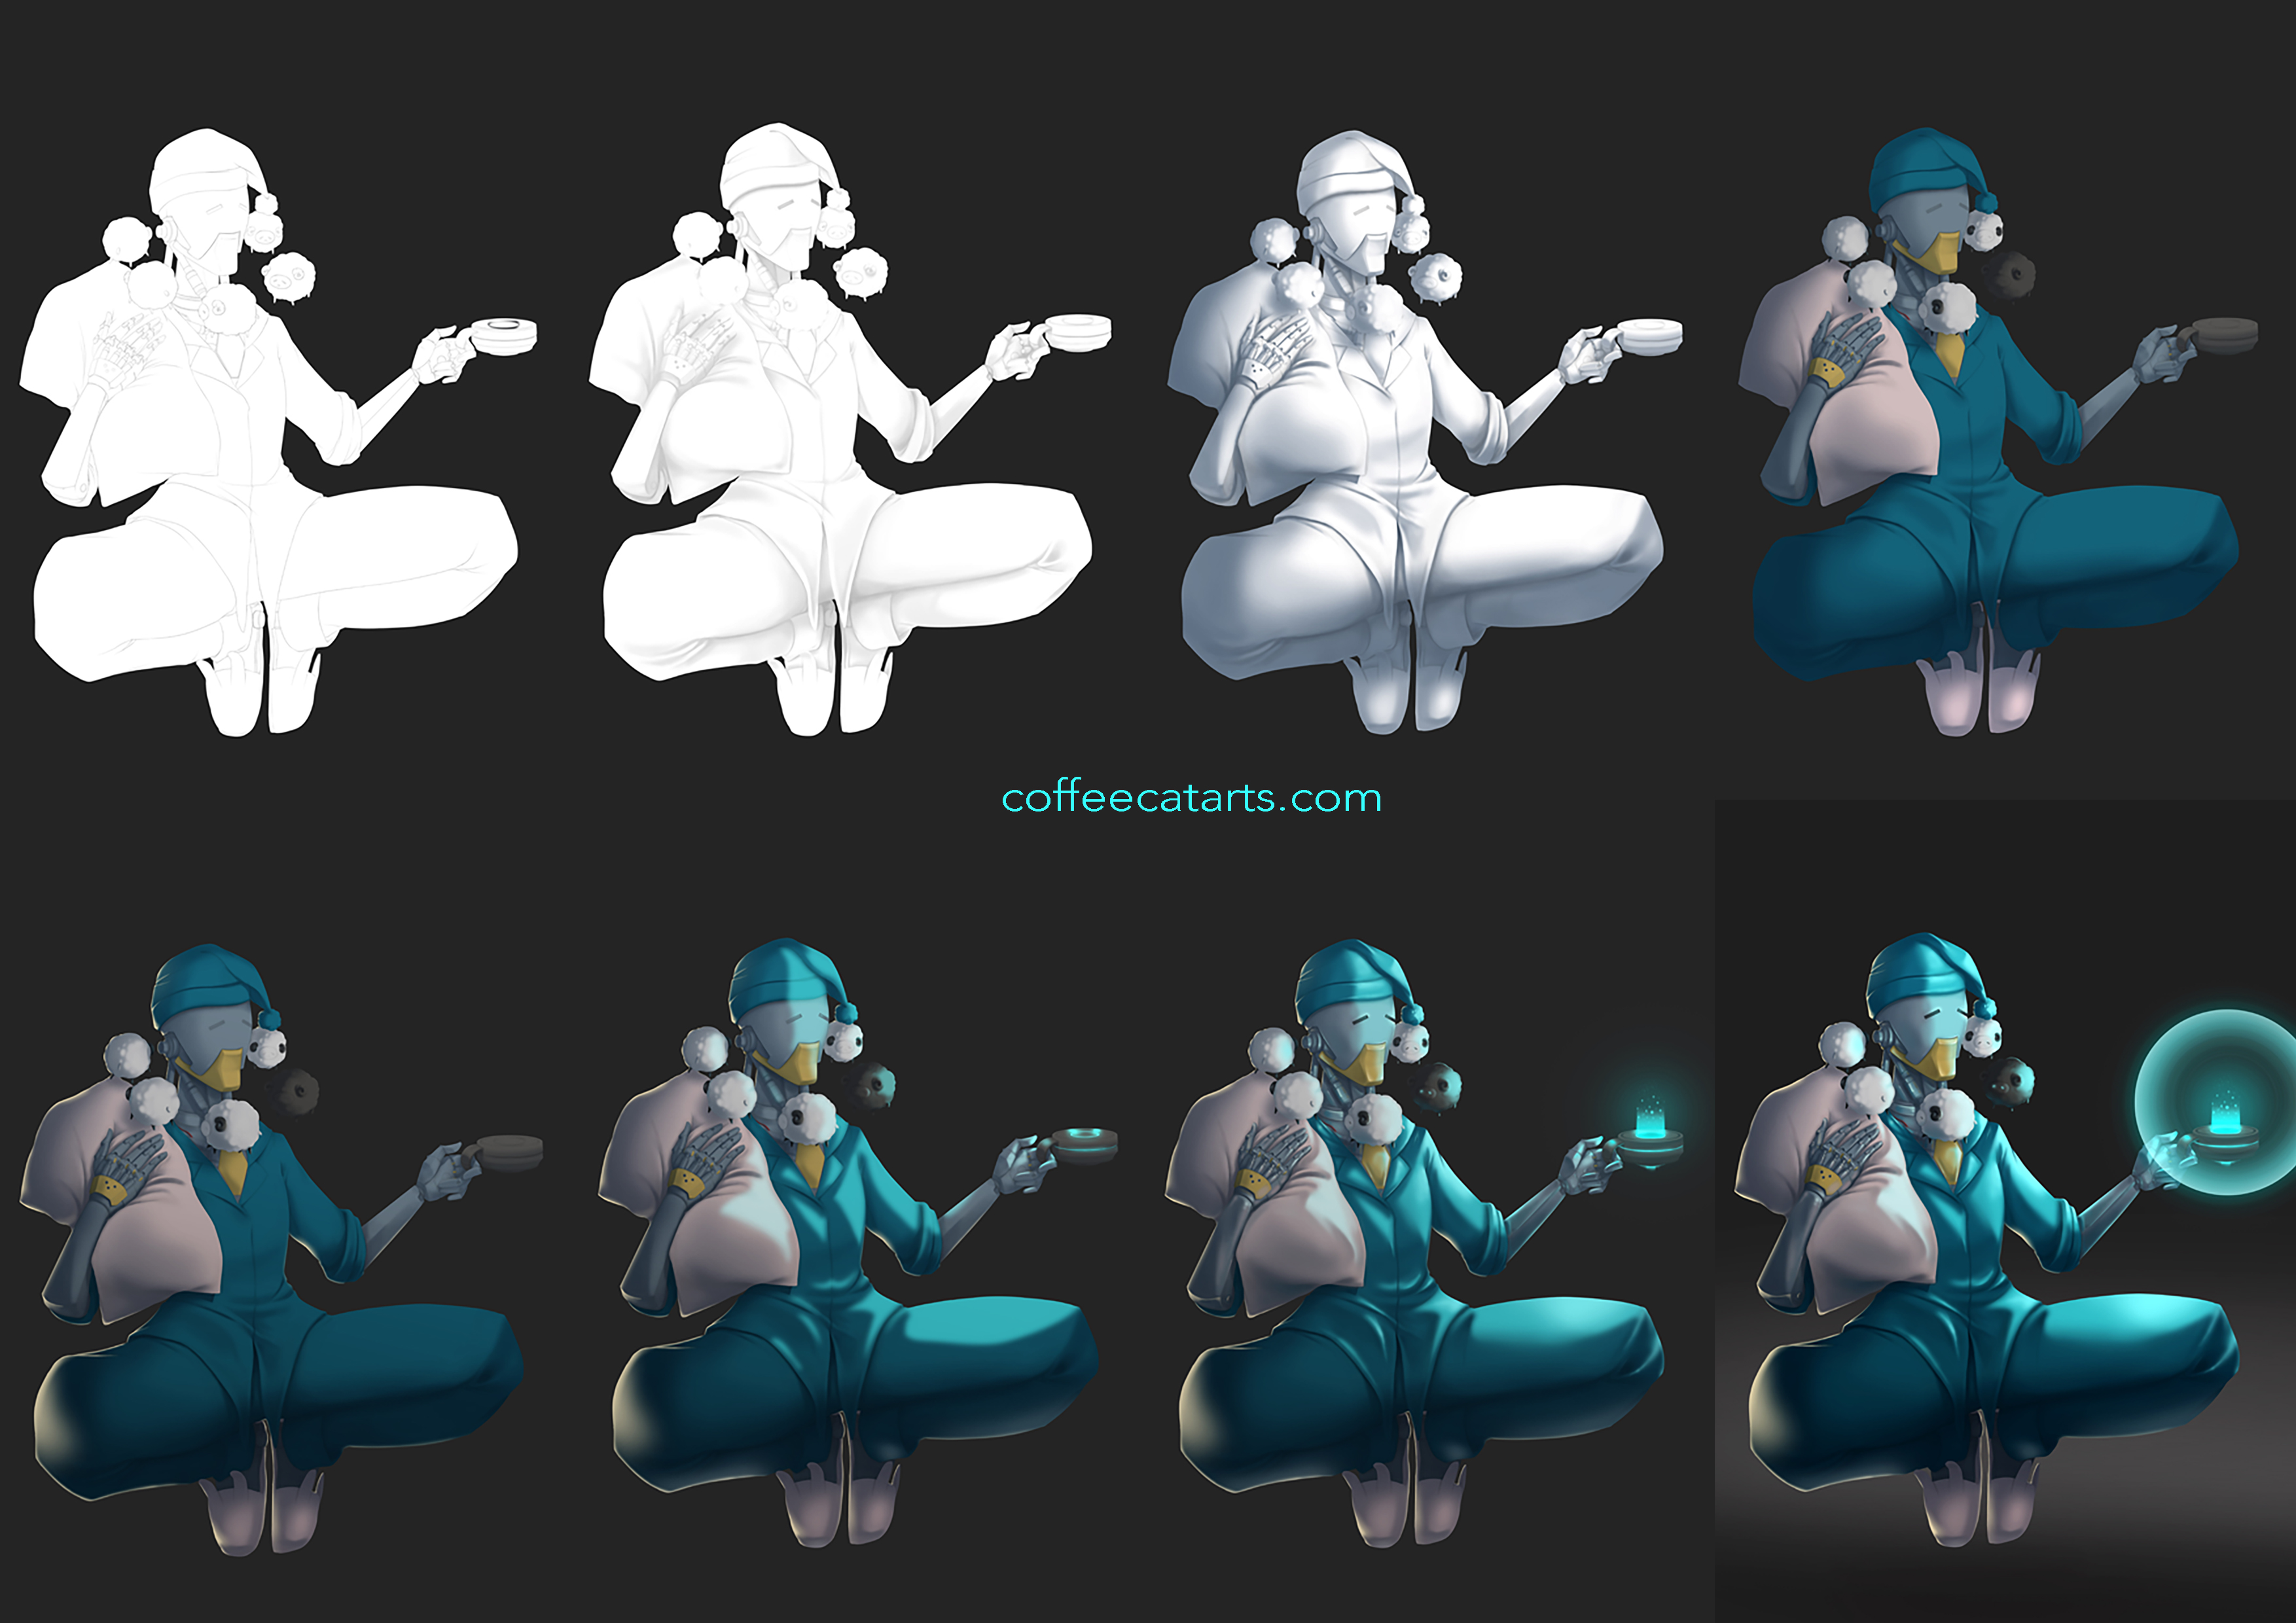
Of course that’s not all the steps and the final step of refining the piece, too quite some time, BUT it was very organised. The steps you can see here are:
1) outline
2) Ambient Occlusion
3) Shadows (actually two layers of different colors)
4) Flad colors
5) Rim light
6) Highlights
7) Details
8) Refinement and color adjustment
With the setup like this, it was a lot easier to unrest for me, what I had to do, to achieve what I had in mind, The final image is very close to Number 8, even though I did duplicate the AO layer, to make the shadows yet a bit darker. In the end it looked like this:
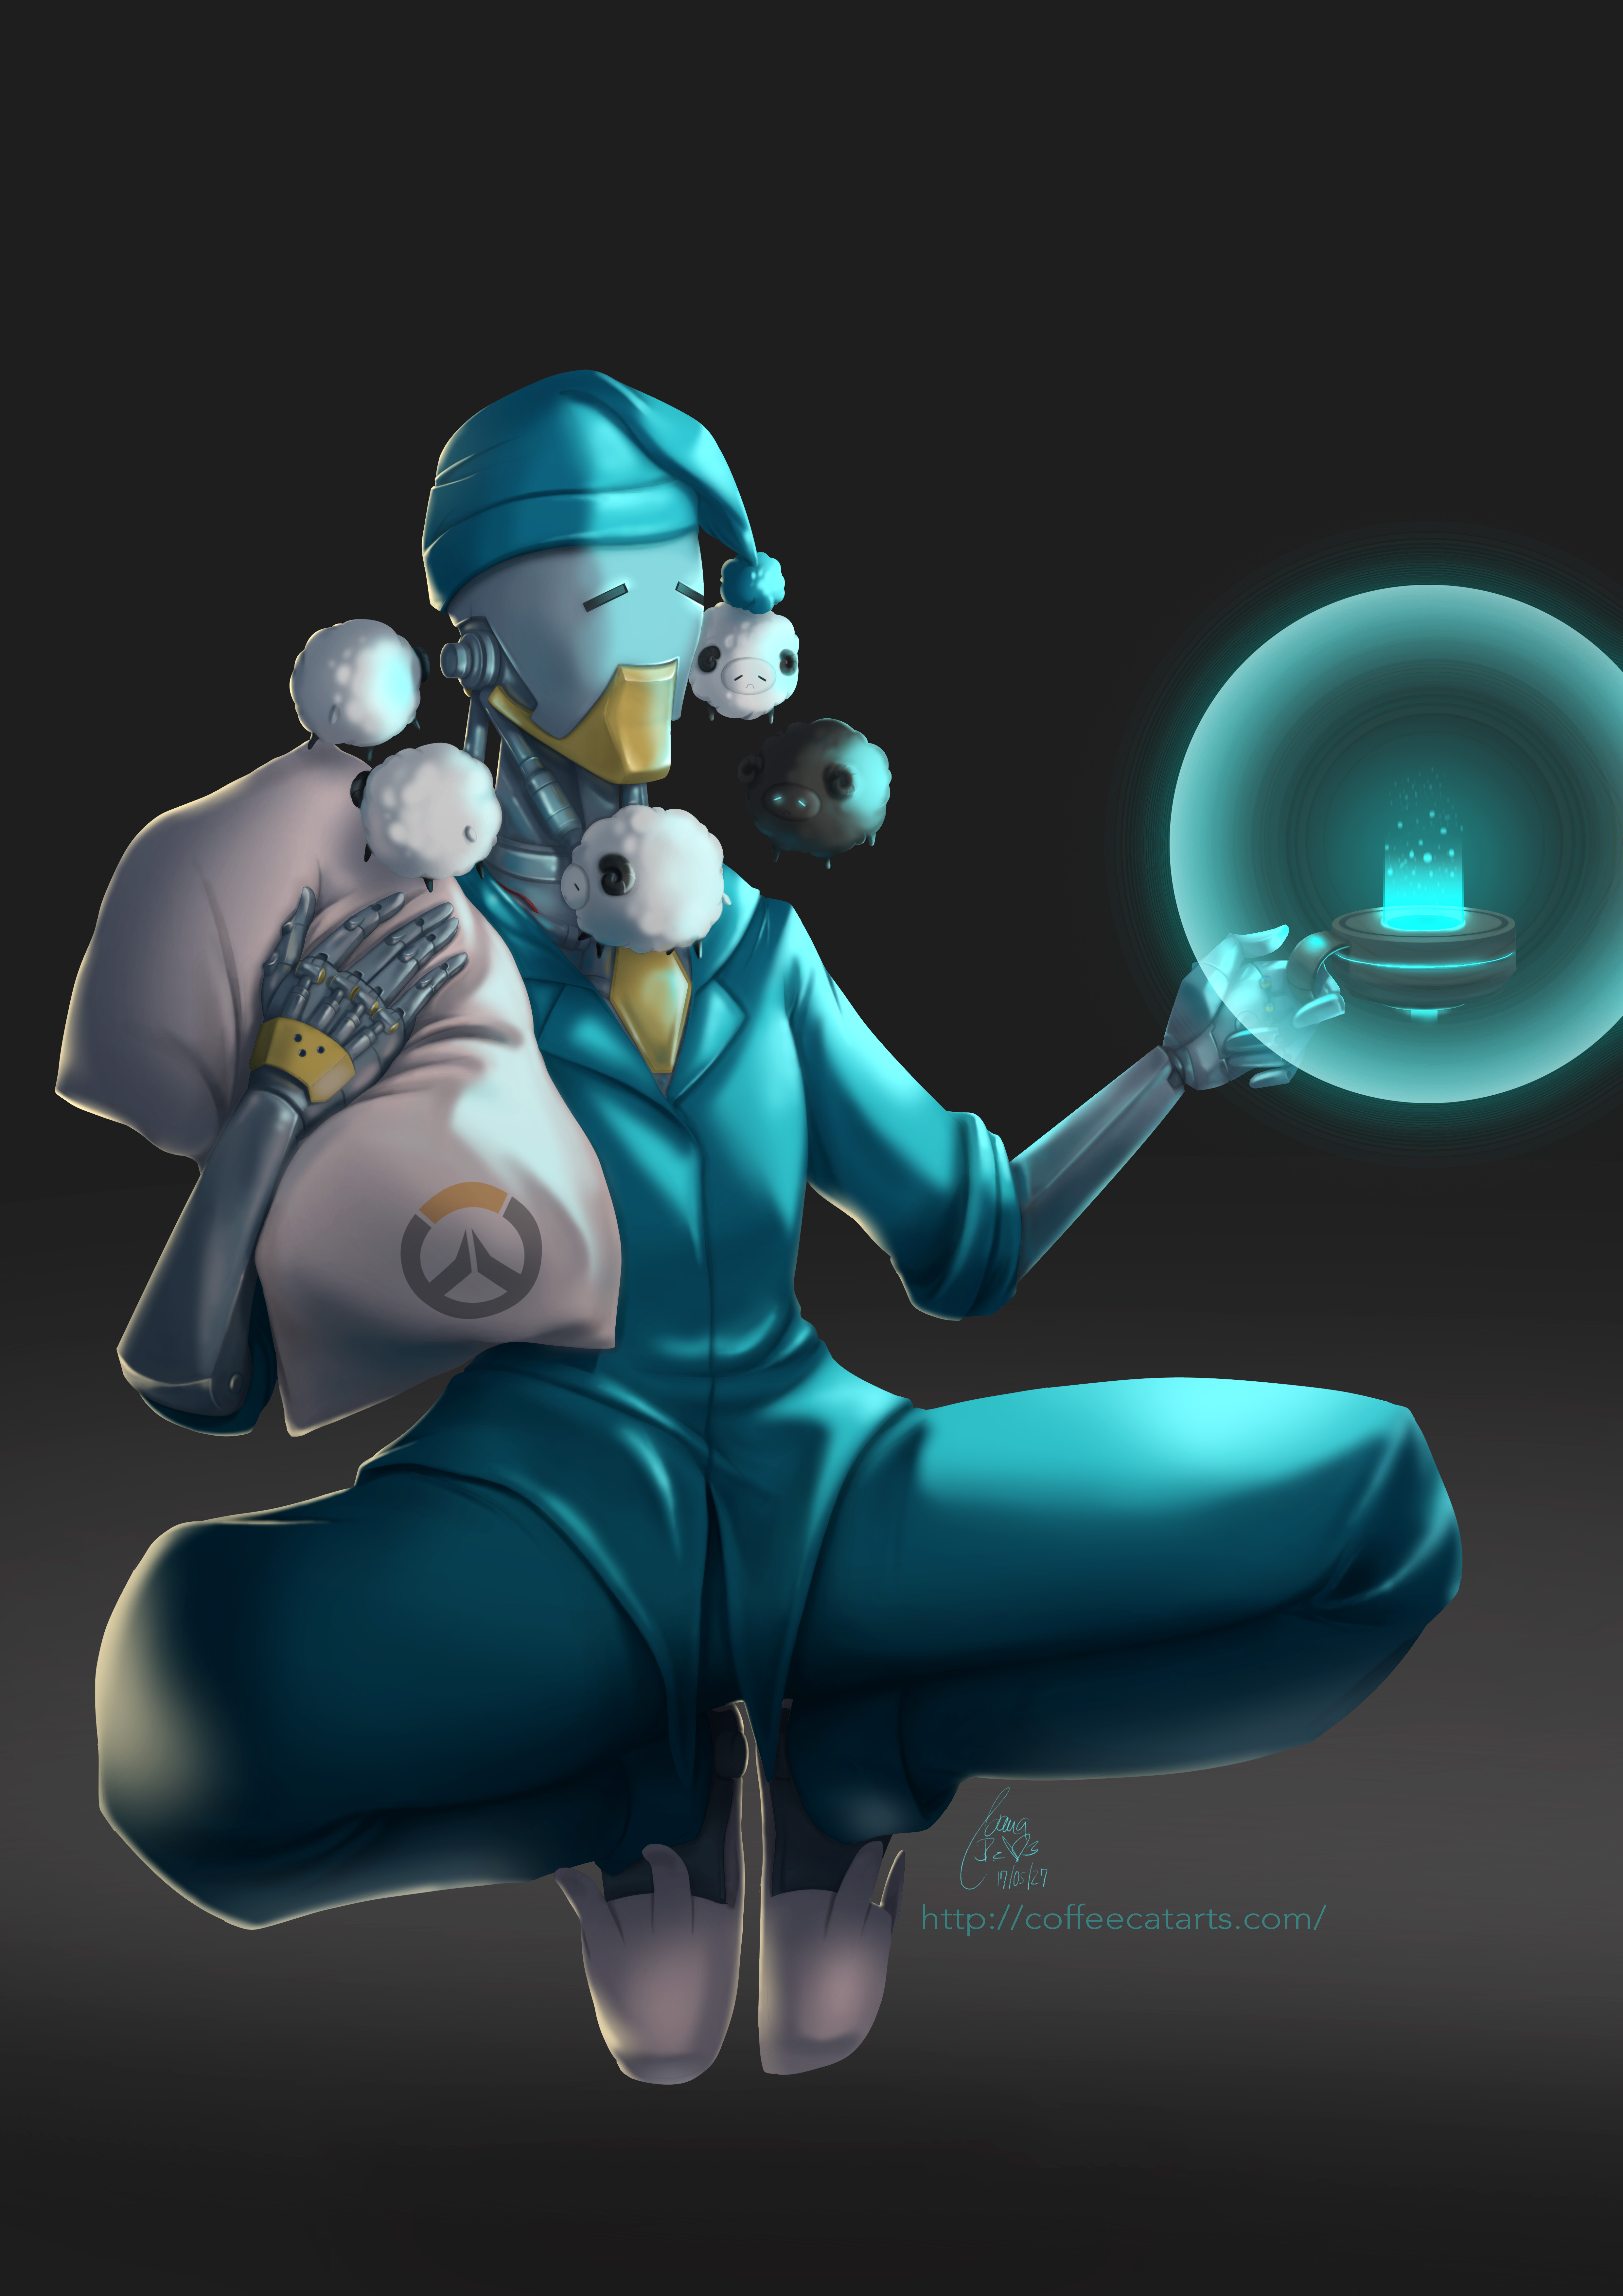
So yes, while I think there are a ton of things I could de better and refine more, for a first try with this method, I am actually quite Ok with it. I actually just wanted to draw the sheep, but oh well, you gotta have to have a Zenyatta to make it worth it!
I hope I can finish the Widowmaker drawing I still got floating around with this, because I feel it would be a good method and right now I am just stuck with it.
In either case, I hope you like it!
Until next time!!!